
Estimated reading time: 9 minutes
There’s something about a banana split that instantly takes me back to being a kid. We didn’t have them very often, so whenever we did, it felt like a special treat. Whether it was after a family dinner or a stop at the local ice cream stand on a warm summer evening, those sweet bananas, chocolate syrup, whipped topping, crunchy peanuts, and bright red cherries always made the day feel just a little more special. That’s exactly what inspired this No-Bake Banana Split Dessert.
THIS POST MAY CONTAIN AFFILIATE LINKS. I MAY EARN A COMMISSION IF YOU PURCHASE THROUGH ONE OF THESE LINKS. PLEASE SEE MY FULL DISCLOSURE POLICY FOR DETAILS. AS AN AMAZON ASSOCIATE, I EARN FROM QUALIFYING PURCHASES.
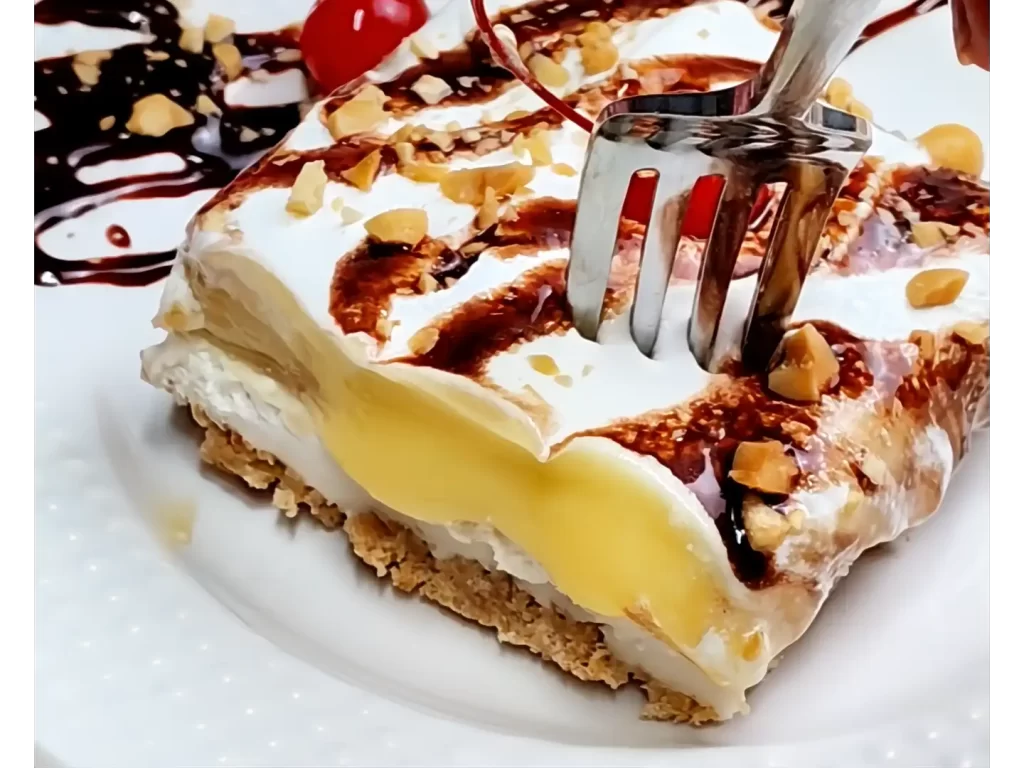
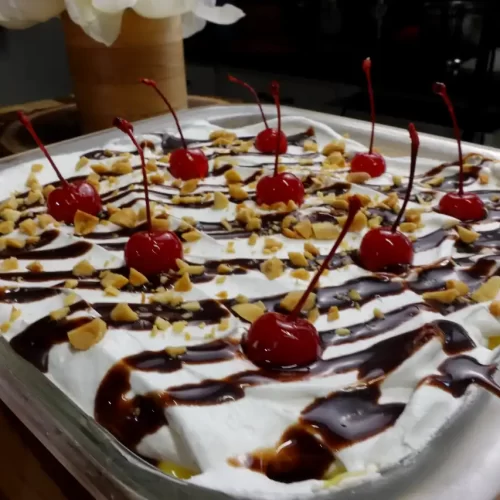
Instead of scooping melting ice cream into bowls, this easy dessert transforms all those classic banana split flavors into a creamy layered dessert that’s perfect for sharing. A buttery graham cracker crust is topped with a rich cheesecake layer, fresh bananas, silky vanilla pudding, fluffy whipped topping, chocolate syrup, crunchy toasted peanuts, and those iconic maraschino cherries.
One of my favorite things about this recipe is that you can make it ahead of time. In fact, it actually tastes even better after it’s been chilling in the refrigerator for several hours. That means you can make dessert the night before your cookout, holiday dinner, church picnic, or family gathering and simply enjoy the day without worrying about last-minute preparations.
If you’re looking for an easy dessert that’s cool, creamy, nostalgic, and absolutely ridic-ulicious, I think you’re going to fall in love with this one.
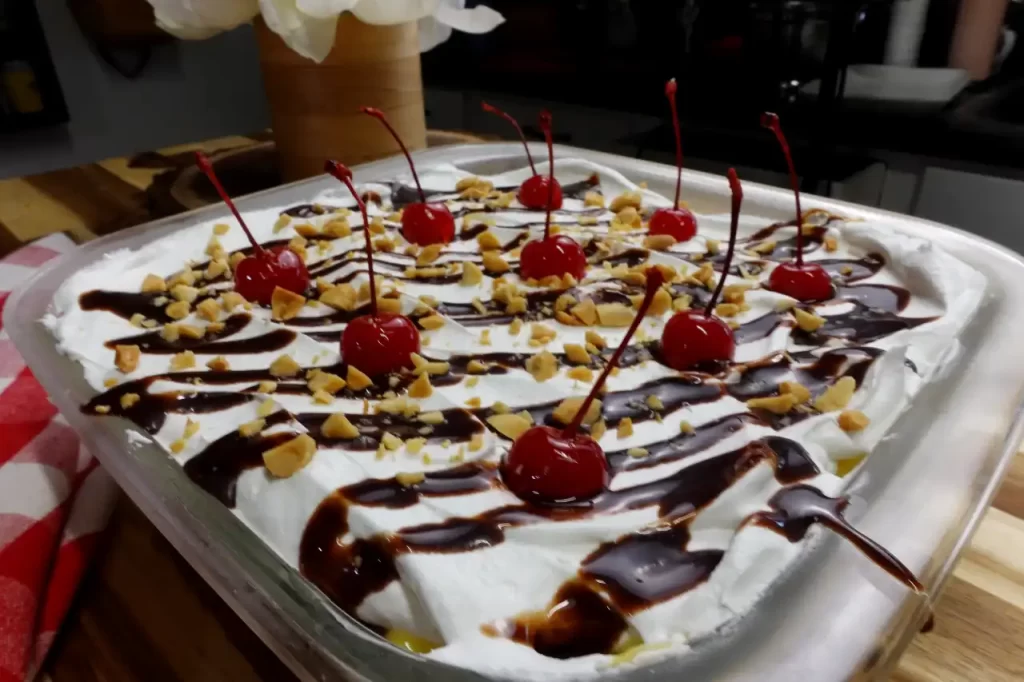
Table of contents
- Why You’ll Love This Recipe
- Ingredients You’ll Need
- How to Make No-Bake Banana Split Dessert
- Nettie’s Tips for the Best Banana Split Dessert
- Variations
- Make-Ahead Tips
- Storage
- What to Serve with No-Bake Banana Split Dessert
- Frequently Asked Questions
- Can I use banana pudding instead of vanilla?
- Reader Favorites
- Final Thoughts
Why You’ll Love This Recipe
If you’re anything like me, you appreciate recipes that look impressive without requiring a lot of work. Fortunately, this dessert checks every box.
You’ll love it because:
- No baking required.
- Perfect for making a day ahead.
- Feeds a crowd with ease.
- Beautiful layered presentation.
- Full of classic banana split flavor.
- Great for birthdays, cookouts, holidays, and potlucks.
- Easy enough for beginner cooks.
- Always one of the first desserts to disappear.
Tools I Use
Many readers ask what tools I use when testing recipes for The Recipe Bowl.
👉 See my full list of favorite kitchen tools here.
Ingredients You’ll Need
Graham Cracker Crust
- 2 cups graham cracker crumbs
- ½ cup butter, melted
- ¼ cup granulated sugar
Cheesecake Layer
- 2 (8-ounce) packages cream cheese, softened
- 1 cup powdered sugar
- 1 teaspoon vanilla extract
- 1 (8-ounce) container whipped topping, thawed
Banana Layer
- 3–4 ripe bananas, sliced
- 1 teaspoon fresh lemon juice (optional)
Vanilla Pudding Layer
- 2 (3.4-ounce) boxes instant vanilla pudding
- 3 1/2 cups Milk
Topping
- 1 (8-ounce) container whipped topping, thawed
- Chocolate syrup
- ½ cup chopped toasted peanuts
- Maraschino cherries
How to Make No-Bake Banana Split Dessert
Step 1: Make the Graham Cracker Crust
In a medium mixing bowl, combine the graham cracker crumbs, melted butter, and sugar. Stir until all of the crumbs are evenly coated and resemble wet sand.
Next, firmly press the mixture into the bottom of a 9×13-inch baking dish. I like using the bottom of a measuring cup because it creates a smooth, even crust.
Place the crust in the refrigerator while you prepare the cheesecake layer.
Step 2: Make the Cheesecake Layer
Using a hand mixer, beat the softened cream cheese until it is smooth and creamy.
Gradually mix in the powdered sugar and vanilla extract until everything is completely combined.
Then gently fold one 8-ounce container of whipped topping into the cream cheese mixture until it becomes light and fluffy.
Spread the cheesecake layer evenly over the chilled graham cracker crust.
Step 3: Add the Bananas
If you’re preparing the dessert ahead of time, lightly toss the banana slices with the teaspoon of lemon juice. This simple step helps keep the bananas looking fresh without affecting their flavor.
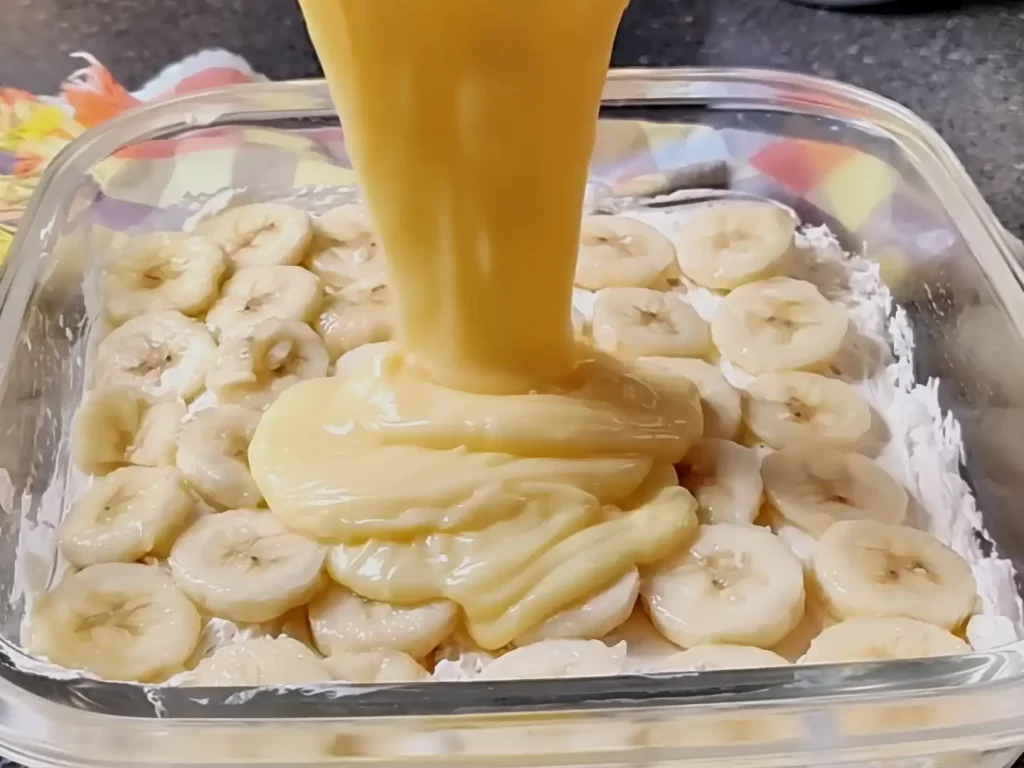
Arrange the banana slices in an even layer over the cheesecake filling, slightly overlapping them so every bite has plenty of banana.
Step 4: Add the Pudding
Mix 3 1/2 cups milk with both boxes of instant vanilla pudding.
Allow the pudding to thicken for about two minutes before gently spreading it over the banana layer.
Using an offset spatula makes this step especially easy and helps create beautiful, even layers.
Step 5: Finish the Dessert
Spread the second 8-ounce container of whipped topping evenly over the pudding layer.
Cover the baking dish and refrigerate for at least 4 hours, although overnight is even better.
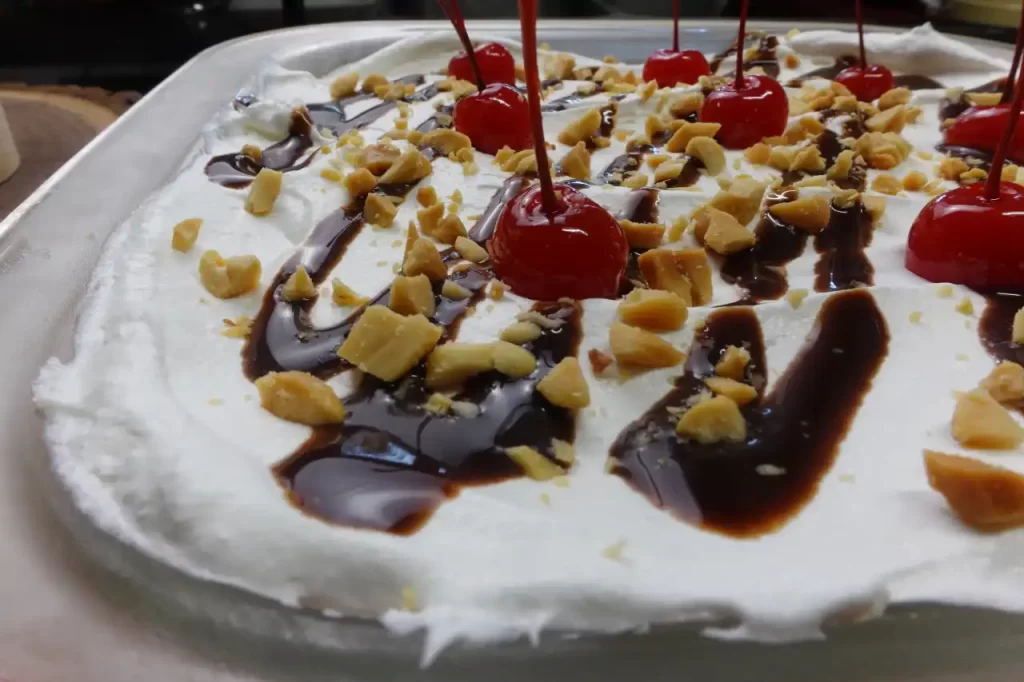
Just before serving, drizzle each slice with chocolate syrup, sprinkle on the toasted peanuts, and top it with a maraschino cherry.
Every bite tastes just like a classic banana split.
Nettie’s Tips for the Best Banana Split Dessert
After making plenty of layered desserts over the years, I’ve learned that a few simple tricks make all the difference.
Use bananas that are ripe but still firm.
Chill the dessert overnight whenever possible.
Toast the peanuts in a dry skillet for 4 to 5 minutes for even more flavor.
Wait until serving to drizzle on the chocolate syrup so the whipped topping stays bright and picture-perfect.
For extra clean slices, place the dessert in the freezer for about 15 to 20 minutes before cutting.
Wipe your knife clean between each slice for bakery-style presentation.
Variations
Although I love this dessert just the way it is, there are plenty of fun ways to make it your own.
Add Chocolate Chips
Sprinkle mini chocolate chips between the banana layer and the pudding for an extra chocolatey bite.
Caramel Banana Split
Drizzle caramel sauce along with the chocolate syrup before serving.
Nut-Free
Simply leave off the peanuts if you’re serving someone with a nut allergy.
Cheesecake Banana Split
For an even richer cheesecake flavor, add an extra teaspoon of vanilla or a splash of almond extract to the cheesecake layer.
Extra Chocolate
Shave a chocolate bar over the whipped topping just before serving for an elegant finish.
Make-Ahead Tips
One of my favorite things about this No-Bake Banana Split Dessert is that it’s actually better after it sits in the refrigerator for a few hours. As the layers chill together, everything firms up beautifully, making each slice easy to serve.
If you’re planning a party or cookout, you can prepare the dessert up to 24 hours ahead of time.
I recommend waiting until just before serving to drizzle on the chocolate syrup, sprinkle over the toasted peanuts, and add the maraschino cherries. That way, the whipped topping stays fluffy and bright, and the finished dessert looks as beautiful as it tastes.
Storage
Cover any leftovers tightly with plastic wrap or an airtight lid and refrigerate for up to 3 days.
Because the dessert contains fresh bananas, it’s definitely at its best during the first couple of days. After that, the bananas will naturally begin to soften.
I don’t recommend freezing this dessert. The pudding and whipped topping tend to separate after thawing, which changes the texture.
What to Serve with No-Bake Banana Split Dessert
This dessert is the perfect ending to almost any summer meal.
Serve it after:
- Grilled burgers
- Hot dogs
- BBQ chicken
- Smoked ribs
- Pulled pork sandwiches
- Steak dinners
- Backyard cookouts
- Church picnics
- Family reunions
- Holiday dinners
No matter what’s on the menu, this cool and creamy dessert is always a welcome finish.
Frequently Asked Questions
Can I make No-Bake Banana Split Dessert the day before?
Absolutely! In fact, I think it tastes even better the next day. Chilling overnight allows the layers to firm up, making the dessert much easier to slice.
How do I keep the bananas from turning brown?
Lightly toss the banana slices with 1 teaspoon of fresh lemon juice before layering them into the dessert. You won’t taste the lemon, but it helps keep the bananas looking fresh.
Can I use homemade whipped cream?
Yes! Homemade whipped cream works wonderfully. Just whip it to stiff peaks so it holds its shape after chilling.
Can I use banana pudding instead of vanilla?
You certainly can. However, I personally prefer vanilla because it lets the fresh banana flavor shine without becoming overpowering.
Reader Favorites
Final Thoughts
Some recipes simply bring back happy memories, and this is definitely one of them. Every bite reminds me of those old-fashioned banana splits that felt like such a special treat growing up. While the flavors are wonderfully nostalgic, this recipe couldn’t be easier to make.
I especially love serving this dessert during the summer because I can prepare it the night before. Then, when family and friends arrive, dessert is already waiting in the refrigerator. All that’s left to do is drizzle on the chocolate syrup, sprinkle over the toasted peanuts, add a bright red cherry, and watch everyone’s face light up.
Sometimes the simplest recipes become the ones everyone remembers. I have a feeling this No-Bake Banana Split Dessert just might become one of those favorites in your family, too.
If you give it a try, I’d love to hear what you think! Leave a comment below, share your favorite banana split memory, and don’t forget to tag The Recipe Bowl on social media so I can see your delicious creations.
Happy cooking,
Nettie
Love spending time in the kitchen or by the grill? You’ll love my Foodie & Griller apparel — made for cooks who do it with style

No-Bake Banana Split Dessert
Ingredients
Graham Cracker Crust
- 2 cups graham cracker crumbs
- ½ cup butter melted
- ¼ cup granulated sugar
Cheesecake Layer
- 2 8-ounce cream cheese, softened
- 1 cup powdered sugar
- 1 teaspoon vanilla extract
- 1 8-ounce whipped topping thawed
Banana Layer
- 4 bananas sliced
- 1 teaspoon fresh lemon juice optional
Vanilla Pudding Layer
- 2 3.4-ounce instant vanilla pudding
- 3 1/2 cups Milk
Topping
- 1 8-ounce whipped topping thawed
- Chocolate syrup
- ½ cup chopped toasted peanuts
- 12 Maraschino cherries
Instructions
- Combine the graham cracker crumbs, melted butter, and sugar. Press firmly into a 9×13-inch baking dish and refrigerate.
- Beat the cream cheese until smooth. Add the powdered sugar and vanilla. Fold in one container of whipped topping and spread over the chilled crust.
- If desired, toss the banana slices with lemon juice. Arrange them evenly over the cheesecake layer.
- Mix pudding mix with 3 1/2 cups milk. Let it stand for about 2 minutes before spreading over the bananas.
- Spread the second container of whipped topping over the pudding layer.
- Cover and refrigerate for at least 4 hours or overnight.
- Just before serving, drizzle with chocolate syrup, sprinkle with toasted peanuts, and garnish each serving with a maraschino cherry.
Notes
Notes
- Chill overnight for the cleanest slices.
- Add the chocolate syrup just before serving.
- Use ripe but firm bananas.
- Toasting the peanuts adds wonderful flavor and crunch.
- Tossing the bananas with lemon juice helps prevent browning.