
Some desserts never go out of style—and chocolate whoopie pies are one of them. They’re soft, cakey, and filled with a creamy center that makes every bite absolutely dreamy. These sandwich-style treats have been around for generations, and today I’m sharing a version that starts with my mom’s chocolate cake recipe. It was moist, chocolatey, and perfect… but I wanted to give it a playful twist. So, I turned it into whoopie pies—and now they’re RIDIC-ULICIOUS.
THIS POST MAY CONTAIN AFFILIATE LINKS, I MAY EARN A COMMISSION. PLEASE SEE MY Full Disclosure Policy FOR DETAILS. AS AN AMAZON ASSOCIATE I EARN FROM QUALIFYING PURCHASES
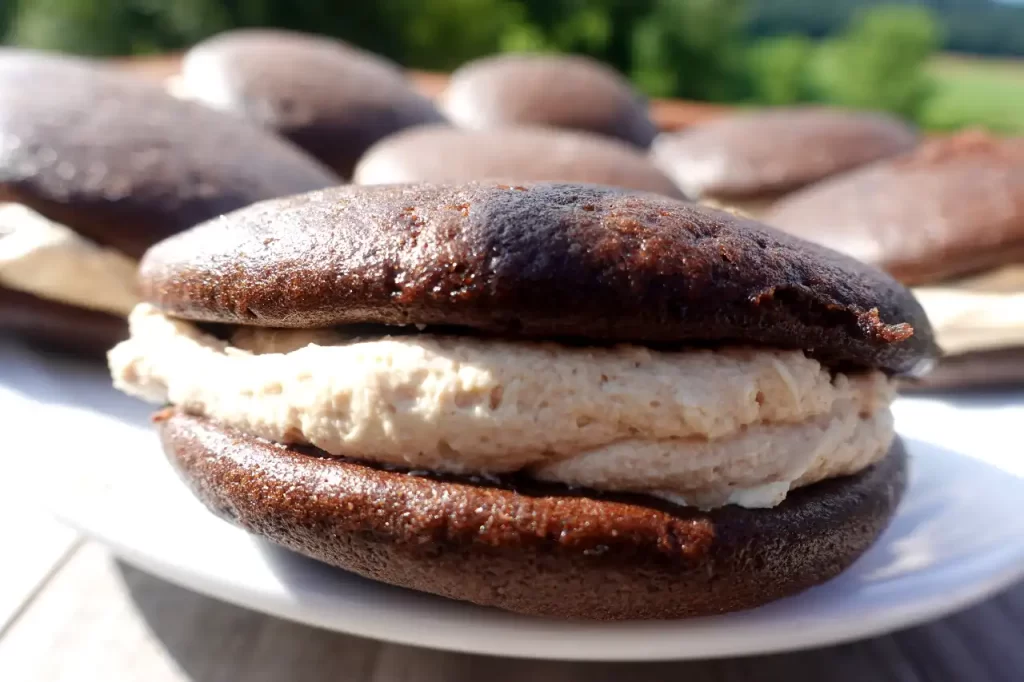
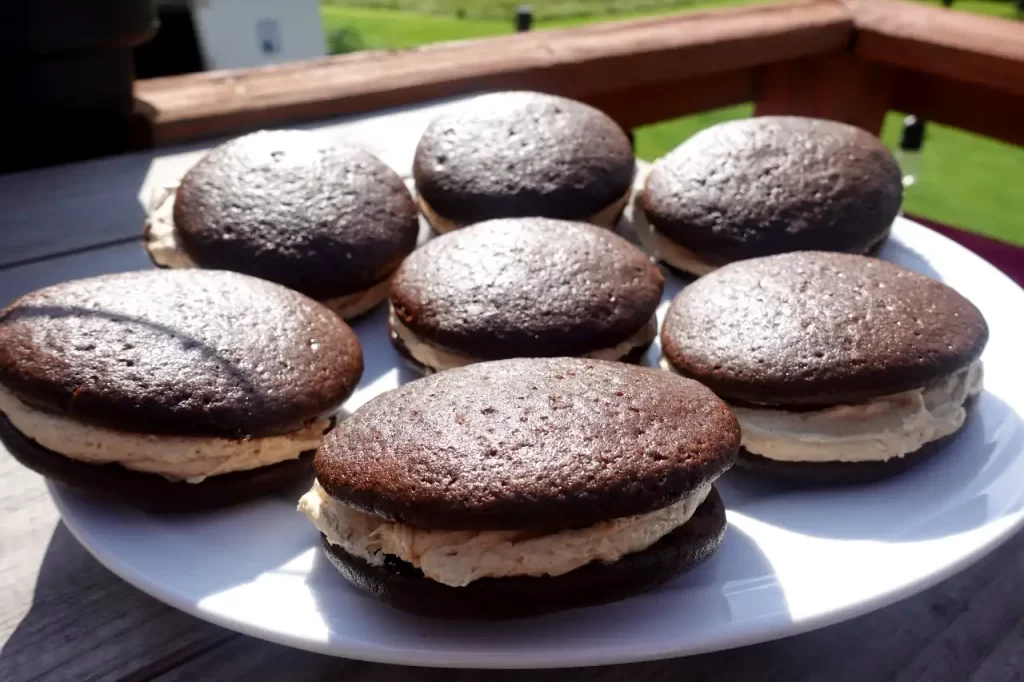
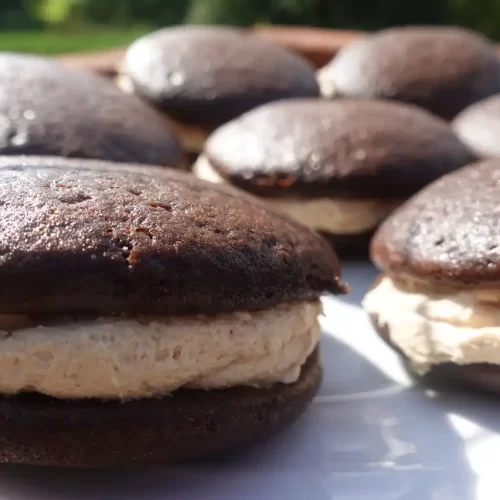
There’s just something fun about picking up a dessert you can hold in your hand. Chocolate whoopie pies aren’t just cute—they’re rich in chocolate flavor and packed with a fluffy peanut butter filling that’s just the right amount of sweet.
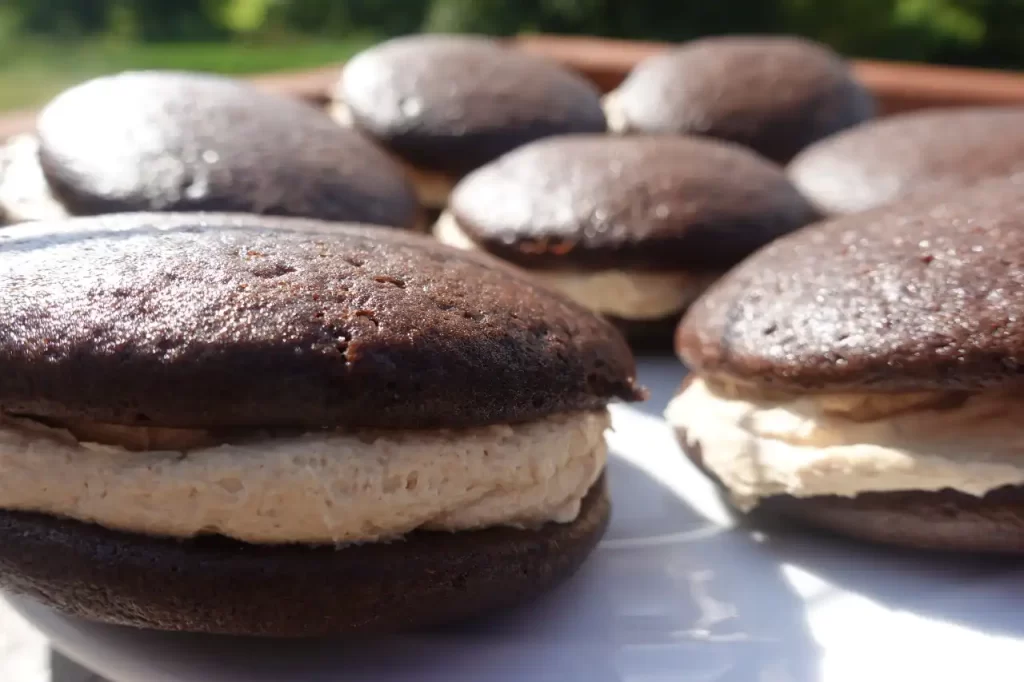
Table of contents
Why Chocolate Whoopie Pies Are So Loved
They’re ideal for:
- Birthday parties
- Bake sales
- After-school treats
- Or anytime you’re craving a chocolatey sandwich cookie
Plus, they travel well and make great edible gifts!
Ingredients for Chocolate Whoopie Pies with Peanut Butter Filling
Here’s everything you’ll need to make the chocolate whoopie pies and the peanut butter filling from scratch.
For the Chocolate Cakes:
- 2 1/4 cups all-purpose flour
- 2/3 cup unsweetened cocoa powder
- 1 1/2 cups granulated sugar
- 1 1/2 teaspoons baking soda
- 1/2 teaspoon salt
- 2 large eggs
- 1/2 cup buttermilk
- 1/2 cup strong brewed coffee, cooled
- 1/2 cup canola oil
- 1 teaspoon vanilla extract
For the Peanut Butter Filling:
- 1/2 cup (1 stick) unsalted butter, softened
- 3/4 cup creamy peanut butter (not natural-style)
- 1 1/4 cups powdered sugar
- 1/4 teaspoon salt (only if using unsalted peanut butter)
- 2–3 tablespoons heavy cream
- 1 teaspoon vanilla extract
If you’ve got these basics on hand, you’re already halfway there!
How to Make Chocolate Whoopie Pies from Scratch
Let’s walk through the process step-by-step so you know exactly what to expect.
Step 1 – Whisk the Dry Ingredients
Start by mixing the flour, cocoa powder, sugar, baking soda, and salt. This gives your cakes a nice even texture and bold chocolate flavor.
Step 2 – Combine the Wet Ingredients
In another bowl, whisk the eggs, buttermilk, oil, vanilla, and cooled coffee. You could even add a spoonful of sour cream here for extra richness.
Step 3 – Make the Batter
Pour the wet ingredients into the dry and stir just until combined. The batter should be thicker than cake batter but not quite as firm as cookie dough. Perfect for scooping!
Step 4 – Bake the Cakes
Drop the batter by scoopfuls onto lined baking sheets and bake for 9–11 minutes. You’ll know they’re ready when the tops spring back lightly to the touch.
Let’s Talk About That Peanut Butter Filling
While the cakes cool, you can whip up the filling. This part is where the magic happens.
The filling is made by beating together:
- Softened butter
- Creamy peanut butter (not natural-style)
- Powdered sugar
- A touch of vanilla
- And a little heavy cream to fluff it up
This creates a light, creamy center that holds its shape but still melts in your mouth. And yes—it’s every bit as good as it sounds!
Assembling Chocolate Whoopie Pies
Here’s the fun part. Match the cakes into pairs. Then pipe or spread the peanut butter filling onto one, sandwich it with the other, and gently press them together. That’s it!
You can chill them to set the filling or enjoy them right away. Either way, they’ll disappear fast.
Tips for Success with Chocolate Whoopie Pies
- Don’t overmix the batter—just stir until everything is combined
- Use a cookie scoop for evenly sized cakes
- Cool completely before filling to avoid a melty mess
- Store in the fridge OR freezer to keep the filling fresh and firm
Want to take them over the top? Add mini chocolate chips to the filling or roll the edges in chopped peanuts!

How to Store Chocolate Whoopie Pies
Here’s the best part—chocolate whoopie pies freeze beautifully, even when filled! I actually store them in my freezer all the time because it’s my husband’s favorite way to eat them. He loves grabbing one straight from the freezer for a cool, fudgy treat.
Thawing Tip: Let them sit at room temperature for 15–20 minutes or enjoy slightly frozen straight from the freezer for an ice cream sandwich vibe! to Store Chocolate Whoopie Pies
Refrigerator: Store in an airtight container for up to 5 days.
Freezer (Filled or Unfilled): Wrap each filled whoopie pie in plastic wrap or place parchment between layers in a sealed container. Freeze for up to 2 months.
Final Thoughts on These Chocolate Whoopie Pies
I love a dessert that brings back memories and still feels fun and new—and chocolate whoopie pies check every box. From that soft cake texture to the smooth peanut butter center, each bite is better than the last. And of course, when I took a bite on camera, you know what I said:
“These are RIDICULICIOUS!” 😍
Try them for yourself and let me know what filling you’d use next—marshmallow, cream cheese, or maybe even Nutella?
More Nettie’s Sweet Treats
Check Out This Cook With Love Apron

Frequently Asked Questions
Can I make whoopie pies ahead of time?
Yes! Bake and cool the cookie halves, then store them airtight for up to 2 days before filling.
Can I freeze chocolate whoopie pies?
Absolutely. Freeze unfilled cookies, then thaw and fill when you’re ready to serve. Filled pies can be frozen.
What filling works best?
Classic cream cheese filling is delicious, but marshmallow cream or buttercream are tasty swaps.
Chocolate Whoopie Pies
Ingredients
For the Chocolate Cakes:
- 2 1/4 cups all-purpose flour
- 2/3 cup unsweetened cocoa powder
- 1 1/2 cups granulated sugar
- 1 1/2 teaspoons baking soda
- 1/2 teaspoon salt
- 2 large eggs
- 1/2 cup buttermilk
- 1/2 cup strong brewed coffee cooled
- 1/2 cup canola oil
- 1 teaspoon vanilla extract
For the Peanut Butter Filling:
- 1/2 cup unsalted butter 1 stick, softened
- 3/4 cup creamy peanut butter not natural
- 1 1/4 cups powdered sugar
- 1/4 teaspoon salt if peanut butter is unsalted
- 2 tablespoons heavy cream
- 1 teaspoon vanilla extract
Instructions
To Make the Chocolate Cakes:
- Preheat oven to 350°F (177°C). Line baking sheets with parchment.
- In a large bowl, whisk flour, cocoa powder, sugar, baking soda, and salt.
- In another bowl, whisk eggs, buttermilk, coffee, oil, and vanilla. Add optional sour cream if using.
- Stir wet mixture into dry until combined. Batter should be thick but scoopable.
- Use a medium cookie scoop to place batter on prepared sheets, leaving space between.
- Bake 9–11 minutes or until tops spring back lightly. Cool completely before filling.
To Make the Peanut Butter Filling:
- Beat butter and peanut butter until fluffy—about 2–3 minutes.
- Add powdered sugar and salt, then beat on low. Increase to medium-high and whip until smooth.
- Add vanilla and 2 tablespoons of cream. Beat until fluffy. Add more cream if needed.
To Assemble:
- Match cooled cakes into pairs.
- Pipe or spread filling onto one cake, top with the other, and gently press to sandwich.
Notes
Storage Notes:
- Store in an airtight container in the refrigerator for up to 5 days.
- Freeze filled or unfilled: Wrap individually or place parchment between layers in a container. Freeze for up to 2 months.
- Pro Tip: We love them straight from the freezer—especially my husband, who says it’s the BEST way to enjoy them!