
A Special Memory with My Daughter, making homemade lollipops
When my daughter was nine, we decided to try our hands at making homemade lollipops, and it quickly became one of our favorite kitchen adventures. Not only did we master the art of candy-making together, but it also led to a heartwarming experience of selling our creations at a local market.
THIS POST MAY CONTAIN AFFILIATE LINKS, I MAY EARN A COMMISSION. PLEASE SEE MY Full Disclosure Policy FOR DETAILS. AS AN AMAZON ASSOCIATE I EARN FROM QUALIFYING PURCHASES.
Those Saturdays spent crafting and sharing our lollipops created memories that were just as sweet as the candy itself. We’d spend Friday evenings preparing the molds and choosing which flavors to experiment with—sometimes classic cherry or grape, and other times wild bubblegum or watermelon. The next morning, we’d package them up in cute little bags tied with ribbons and set up a table with handwritten signs. Watching her excitement as customers stopped to sample and smile was one of those magical parenting moments I’ll never forget. It was more than just a candy recipe—it was the beginning of her creativity, confidence, and love for homemade treats.
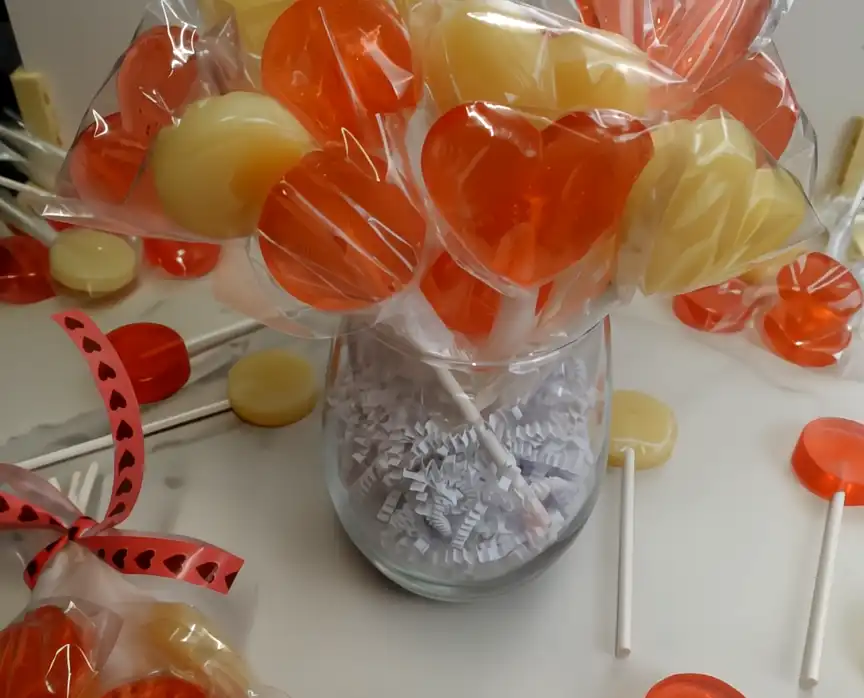
Table of contents
Why You’ll Love These Homemade Lollipops
- Fun for All Ages – Whether you’re making these with your kids, for a party, or just to enjoy a sweet treat, homemade lollipops are a blast to create. Watching the sugar transform into colorful, glossy candy is pure magic.
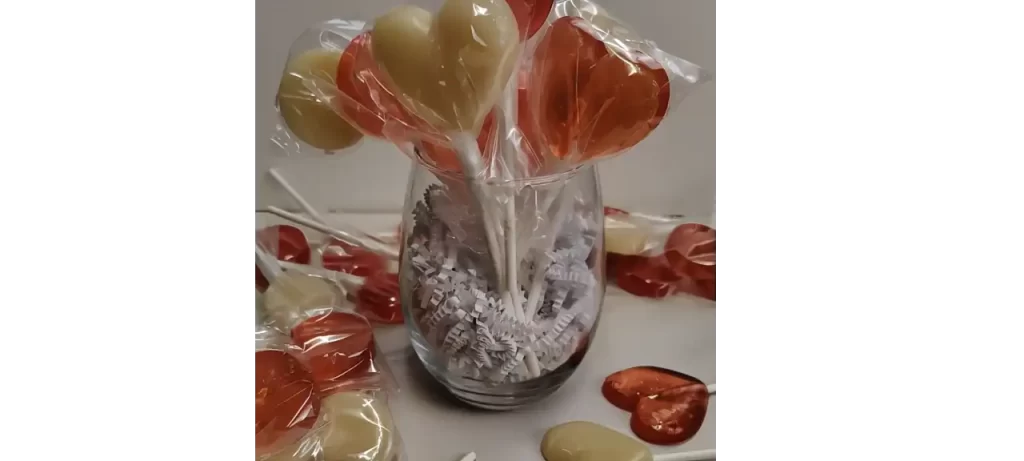
- Customizable Flavors and Shapes – You’re not limited to just one type of lollipop. Use any flavoring oil and any shape mold you like—from classic circles to hearts, stars, or seasonal themes. They’re perfect for holidays, birthdays, or “just because” days.
- Budget-Friendly Gifts – These lollipops make adorable and affordable gifts! Wrap them in cellophane with a ribbon and you have a sweet party favor, classroom treat, or thoughtful homemade Valentine.
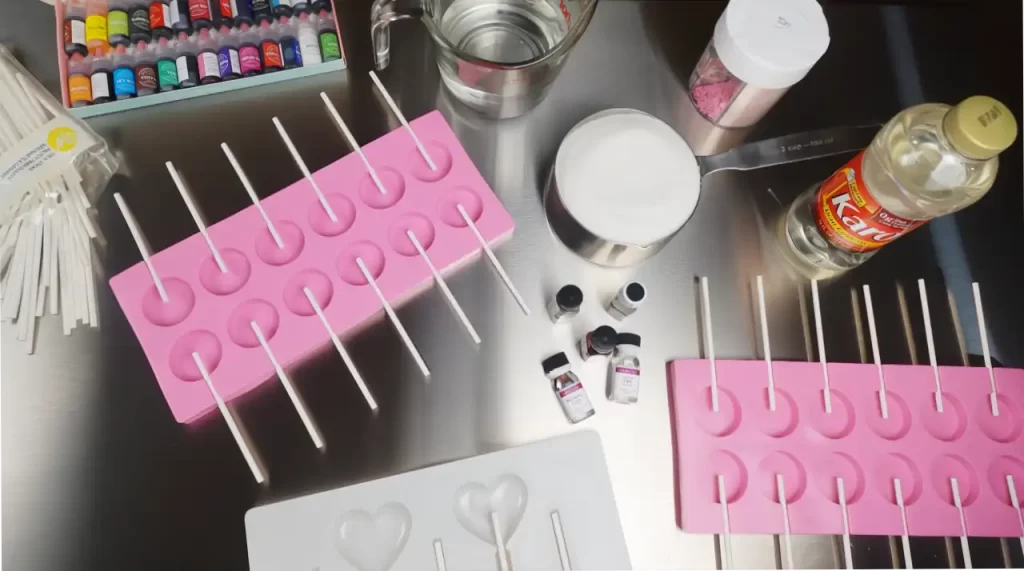
- No Fancy Tools Needed – You don’t need a candy-making kit. Just a saucepan, a thermometer (or a cup of cold water if you don’t have one), and some molds or a baking sheet. Simple and satisfying!
- Great Make-Ahead Treat – Once cooled and wrapped, homemade lollipops store well for weeks. They’re a fantastic make-ahead option for parties, markets, or gifting.
These lollipops aren’t just delicious—they’re an experience. From boiling sugar to choosing colors and flavors, every step is an opportunity to get creative and have fun.
How to Make Homemade Lollipops
Ingredients You Will Need
- 2 cups white sugar
- 2/3 cups corn syrup (such as Karo)
- 1 cup water
- 1/2 teaspoon flavoring oil-I recommend this collection!!
- 5 drops of food coloring – I love this set of food coloring-so many colors!(choose your favorite color)
Step-by-Step Instructions
- Prepare lollipop molds by lightly spraying with non-stick spray and wiping out with a paper towel so only a thin film remains. Insert lollipop sticks into the molds.
- Combine sugar, corn syrup, and water in a medium saucepan. Stir until the sugar is dissolved.
- Using a damp pastry brush, brush down the sugar crystals that stick to the side of the pan to prevent crystallization.
- Place the saucepan over medium-high heat and bring the mixture to a boil. Once it starts to boil, insert a candy thermometer and do not stir.
- Cook the mixture until it reaches the hard crack stage at 300°F (149°C). If you don’t have a candy thermometer, you can test by dropping a small amount of the mixture into a glass of cold water. If it forms hard, brittle threads that snap when bent, you’ve reached the hard crack stage.
- Remove the pan from heat and allow the bubbling to stop.
- Quickly stir in your flavoring oil and food coloring. Be careful—the mixture is extremely hot.
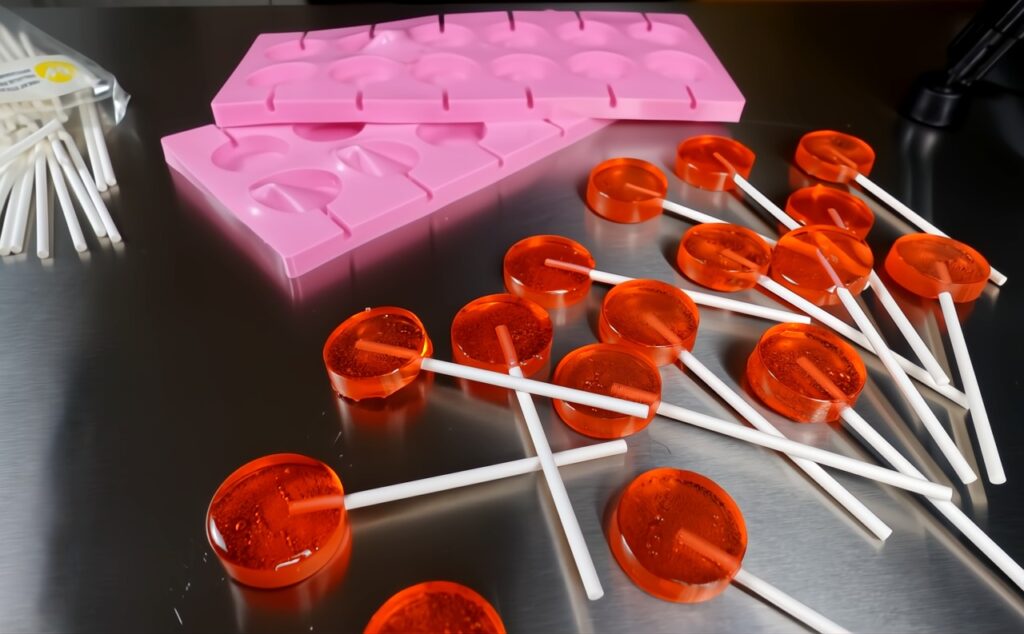
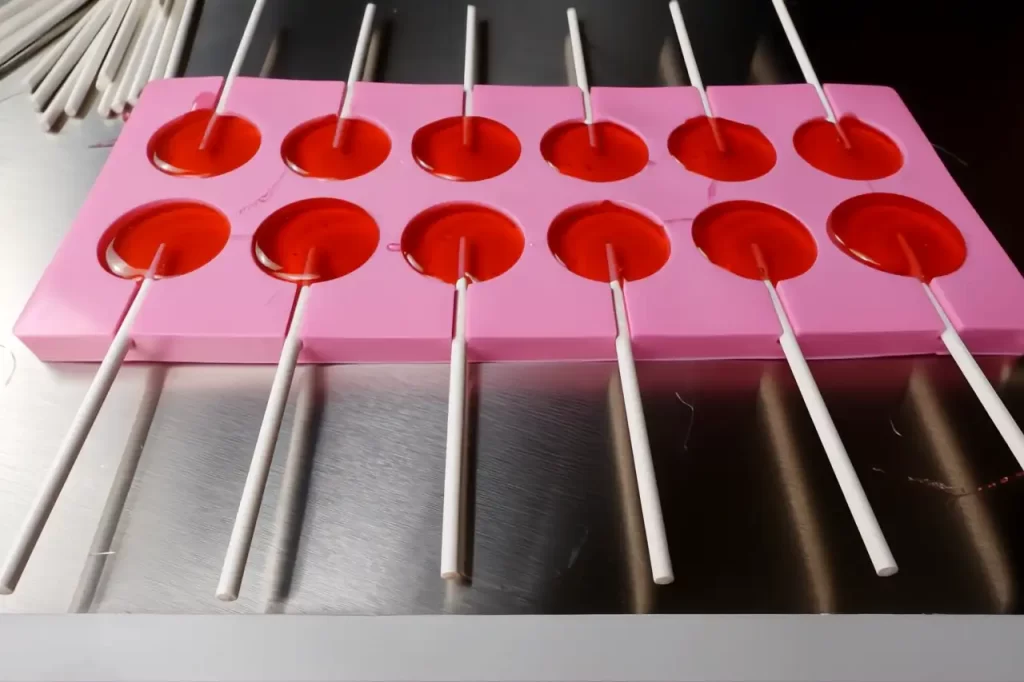
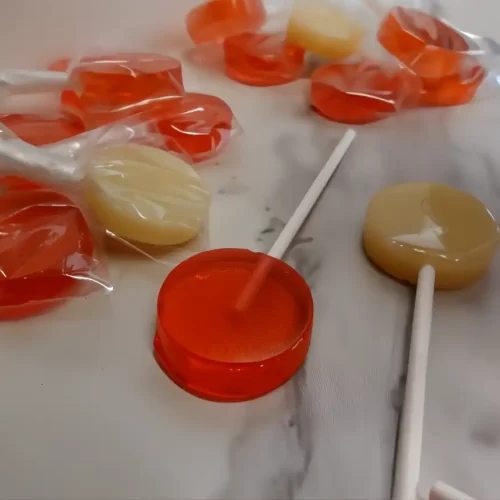
- Spoon or pour the mixture into the prepared lollipop molds. Work quickly, as the candy will begin to set almost immediately.
- Allow your homemade lollipops to cool completely in the molds. Once hardened, pop them out and enjoy!

Tips and Tricks for Perfect Homemade Lollipops
- Prepare your molds in advance. Lightly grease them or line with non-stick spray to ensure easy removal.
- Work quickly but safely. Candy sets rapidly once removed from heat, so have all your tools and ingredients ready.
- Use high-quality flavoring oils. These provide a stronger and more vibrant flavor in your homemade lollipops than extracts.
- Keep the temperature consistent. If the mixture doesn’t reach the hard crack stage, your lollipops may turn out chewy rather than crisp.
- Cleaning up hardened candy. Soak any hardened candy on equipment in hot water until it dissolves, making cleanup easy and stress-free.
- Avoiding air bubbles. Do not over-stir the mixture, as this can introduce excess air. Let the syrup settle for a few moments after heating to allow air bubbles to rise and pop naturally. When pouring, do so slowly and steadily to minimize the introduction of air bubbles.
Frequently Asked Questions About Homemade Lollipops
Can I make lollipops without a mold?
Yes! Pour the candy onto a greased baking sheet and use a spoon to shape it into circles. Insert sticks before it cools.
What if I don’t have a candy thermometer?
Testing in cold water is a reliable method. Drop a bit of the mixture into the water. If it forms brittle threads, you’ve reached the hard crack stage.
How do I store homemade lollipops?
Wrap them individually in lollipop bags, plastic wrap or store in an airtight container to prevent moisture from affecting their texture.
Why Make Homemade Lollipops?
Not only are they delicious, but they’re also a fun and creative project for all ages. Plus, you can customize flavors and colors to match any occasion, from birthday parties to holiday gifts. Making homemade lollipops is an enjoyable activity that creates sweet memories and treats!
Reader Favorites
Peanut Butter Chocolate Swirl Fudge
And More!!!…….

Homemade Lollipops
Ingredients
- 2 cups white sugar
- 2/3 cups corn syrup Karo
- 1 cup water
- 1/2 teaspoon flavoring oil your favorite flavor!
Instructions
- Prepare candy molds by lightly spraying with non-stick spray and wiping out with a paper towel so only a thin film remains. Insert lollipop sticks into the molds.
- Combine sugar, corn syrup, and water in a medium saucepan. Stir until the sugar is dissolved.
- Using a damp pastry brush, brush down the sugar crystals that stick to the side of the pan to prevent crystallization.
- Place the saucepan over medium-high heat and bring the mixture to a boil. Once it starts to boil, insert a candy thermometer and do not stir.
- Cook the mixture until it reaches the hard crack stage at 300°F (149°C). If you don’t have a candy thermometer, you can test by dropping a small amount of the mixture into a glass of cold water. If it forms hard, brittle threads that snap when bent, you’ve reached the hard crack stage.
- Remove the pan from heat and allow the bubbling to stop.
- Quickly stir in your flavoring oil and food coloring. Be careful—the mixture is extremely hot.
- Spoon or pour the mixture into the prepared candy molds. Work quickly, as the candy will begin to set almost immediately.
- Allow the lollipops to cool completely in the molds.
Great recipe! My culinary HS students loved them! Easy to follow
Thank You! I am so glad!